Draw a Circle on Sketch Up
Drawing Bones Lines
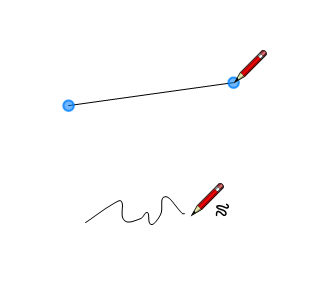
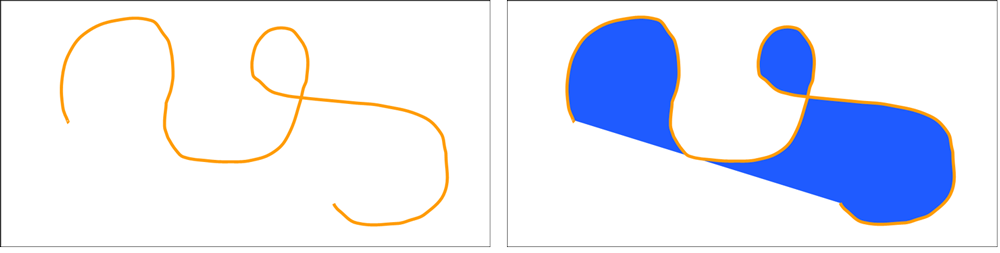
To draw the near basic lines in your LayOut certificate, you tin can use the orderly Line tool to draw directly lines or its freewheeling cousin, the Freehand tool, to draw loopy swerving lines whatever which manner yous like. You encounter an example of both in the following effigy.
Each tool has a few tricks and secrets, as explained in the following sections.
Tip: The Line tool also creates curves that are smoother than those you lot can draw with the Freehand tool. For details about creating curves with the Line tool, run into Bending Lines and Shapes with Paths and Points. Also, although you can create closed shapes with the Line or Freehand tool, creating a shape and filling it with a colour or pattern frequently creates a better event.
Drawing straight lines
Predictably, you describe lines with the Line tool ( ), which y'all find on the default toolbar or the Tools menu.
To draw a line or lines, follow these steps:
- Select the Line tool.
- To place the line'southward starting point, click in the cartoon area or set a precise location using the Measurements box. For details nearly using the Measurements box to describe lines, run across the post-obit table. To lock the line to the red or green axis, hold down the Shift central. (Run across Drawing Lines and Shapes for an introduction to LayOut'southward inference engine.)
- To place the line'southward end point, double-click in the cartoon area. (Alternately, you can select a new tool.)
Tip: If you single-click, LayOut treats the line'due south end betoken as the starting point for some other line, which is a handy style to describe polylines and unique closed shapes with the Line tool. To finish a polyline, double-click or click the endpoint of another line.
Draw a line using coordinates
When you select the Line tool, the Measurement'south box is ready for you to type precise points, or coordinates, to define your line. Here'south how to use the Measurements box:
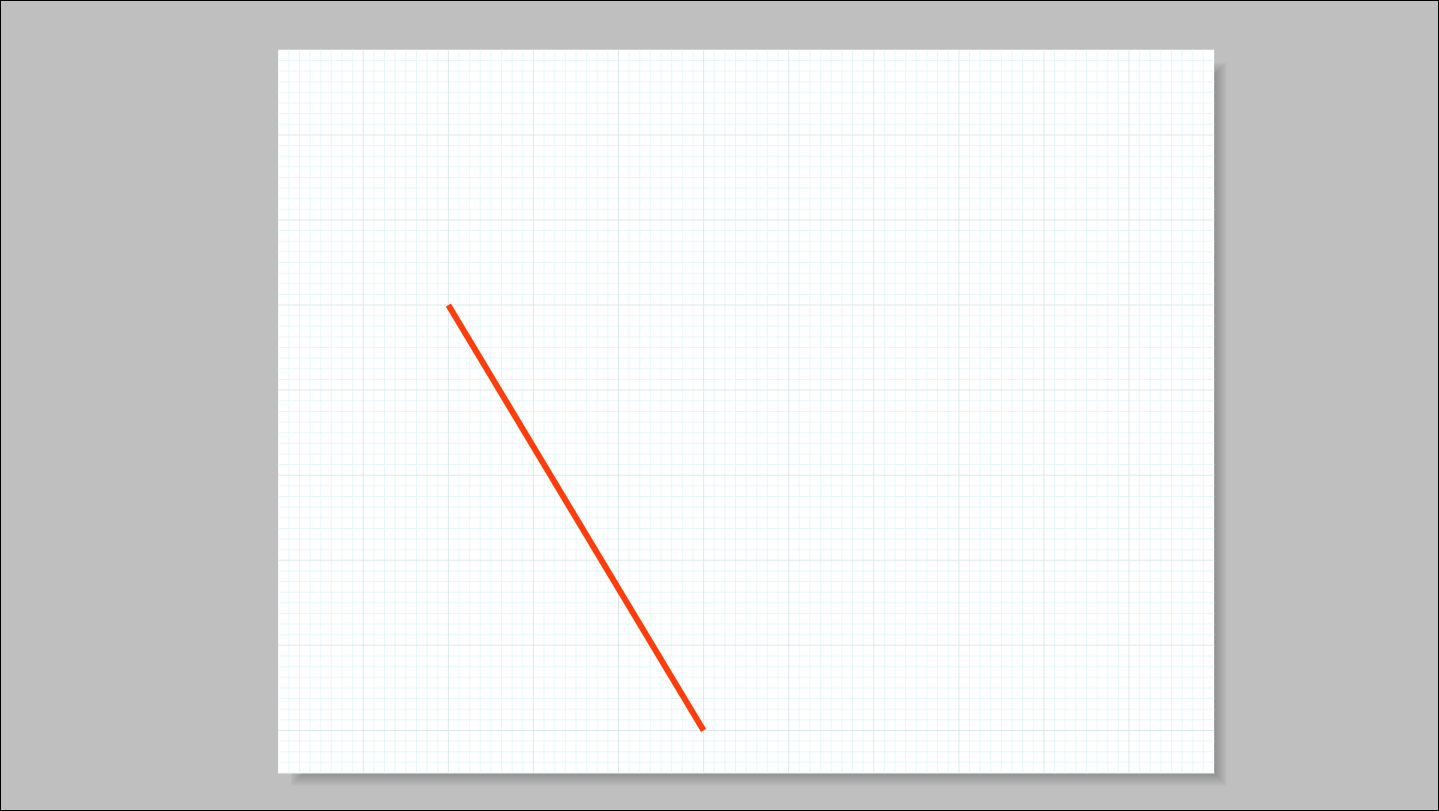
- Click in the drawing area or blazon an accented coordinate value to gear up the starting betoken. Accented coordinates are measured from the upper-left corner of the cartoon area. For case, to prepare the starting point shown in the following figure, type an absolute coordinate of [2",iii"] and press Enter (Microsoft Windows) or Return (Mac OS X).
- Afterward you define the first coordinate, you lot can define the second coordinate, or end betoken, with one of three coordinate types: accented, relative, or polar. In the post-obit figure, the end point was created with the absolute coordinates [5",8"].
- After yous type the terminate betoken coordinates, press Enter or Render, and your line appears precisely equally you indicated.
| Coordinate Type | How It Works | Example |
|---|---|---|
| Absolute | Values are measured from the upper left of the drawing area. The first value is the X, or red, axis. The second value is the Y, or green, axis. | [5",viii"] |
| Relative | Values are relative to the line's starting indicate. | 3,0 |
| Polar | The start value is an angle, measured counter-clockwise from the positive Ten axis. The second value is the number of default units from the line's starting point. | ^45,two" |
Tip: Until you select another tool, you can keep entering new coordinates to add together to your line, creating a polyline.
Draw a tangent line
If you lot need to draw a line that is tangent to an existing arc or circle, you can set a start point anywhere exterior the circumvolve and then hover the Line tool cursor over the edge of the circumvolve until the the Tangent betoken inference appears, as shown in the post-obit effigy. Then click to place the end point at the tangent indicate.
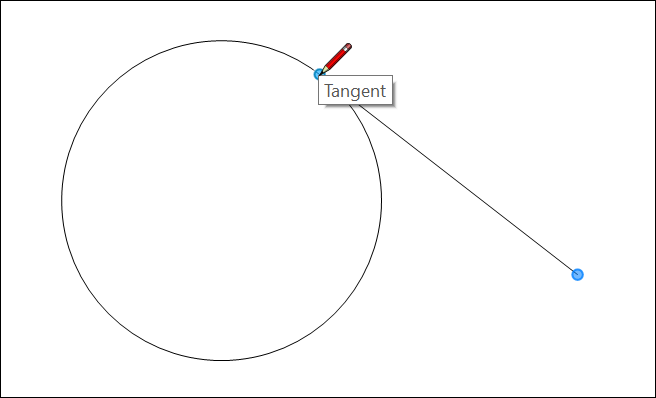
You tin can also set a line's get-go point on a circle or arc. Subsequently you place the kickoff indicate, movement the cursor until you see a prophylactic band-like inference line running tangent to the current mouse position. The line as well seems to snap to the tangent point. Click to place the line's terminate point, and the tangent line appears.
Toggle the Auto Join feature
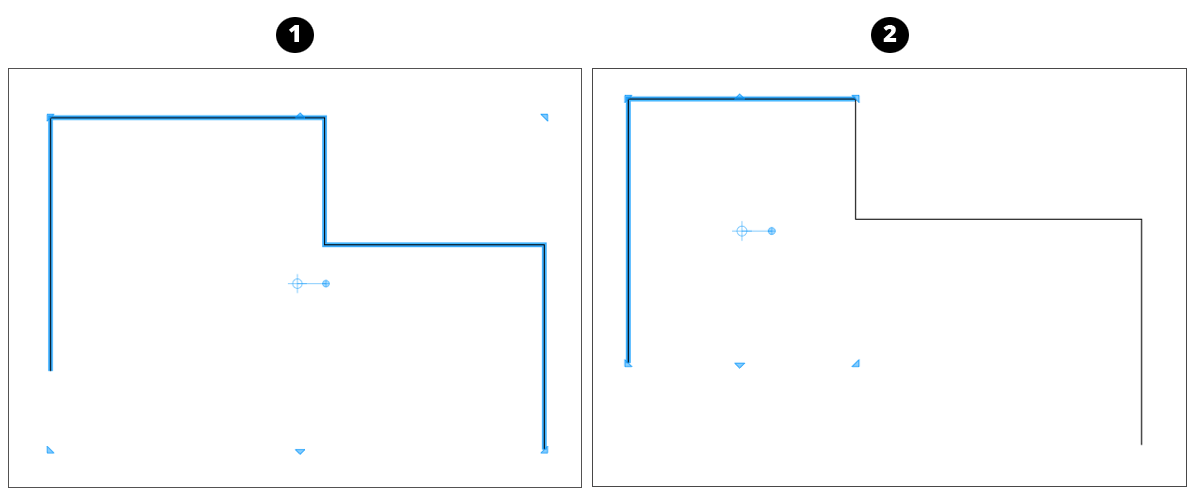
When y'all set a line's start point at the end of an existing line, by default, the new line joins the existing lines. As a outcome, afterwards you finish drawing and select one of the lines, both the existing and new lines share a context. (See Callout 1 in the post-obit figure.)
The Auto Join setting controls this behavior. If you toggle off Machine Join feature, the existing line or lines and the newer line or lines won't share a context when you lot select one of the lines.
To plough off Auto Bring together, context-click while the Line tool is active. On the context menu, articulate the checkmark next to the Car Bring together Lines option. After you toggle off Auto Bring together, the lines you draw beginning at an existing end point are not joined to existing lines. You lot can see the result in the post-obit effigy. (Callout two)
Drawing freehand lines
With the Freehand tool ( ), you can draw loopy lines or irregular shapes. (If you want to create arcs or curves, check out Creating Arcs or Bending Lines and Shapes with Paths and Points instead.)
To select the Freehand tool, click the down pointer adjacent to the Line tool on the default toolbar or choose Tools > Lines > Freehand from the menu bar.
To draw with the Freehand tool, follow these steps:
- Select the Freehand tool.
- Click and drag the cursor to draw a curvy line or irregular shape. Drawing freehand can take patience and do. Moving the mouse slowly helps you lot draw a smooth line.
- Release the mouse cursor to stop cartoon. If you end the freehand line dorsum at the starting point, y'all create a airtight shape.
Tip: If you add a Fill colour to a freehand line or shape, it fills with colour as y'all draw (as shown in the righthand paradigm). For details about calculation or changing the Fill color, see Filling Shapes with Colors and Patterns.
Source: https://help.sketchup.com/en/layout/drawing-basic-lines
0 Response to "Draw a Circle on Sketch Up"
Postar um comentário